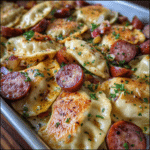
Sheet Pan Pierogies and Kielbasa
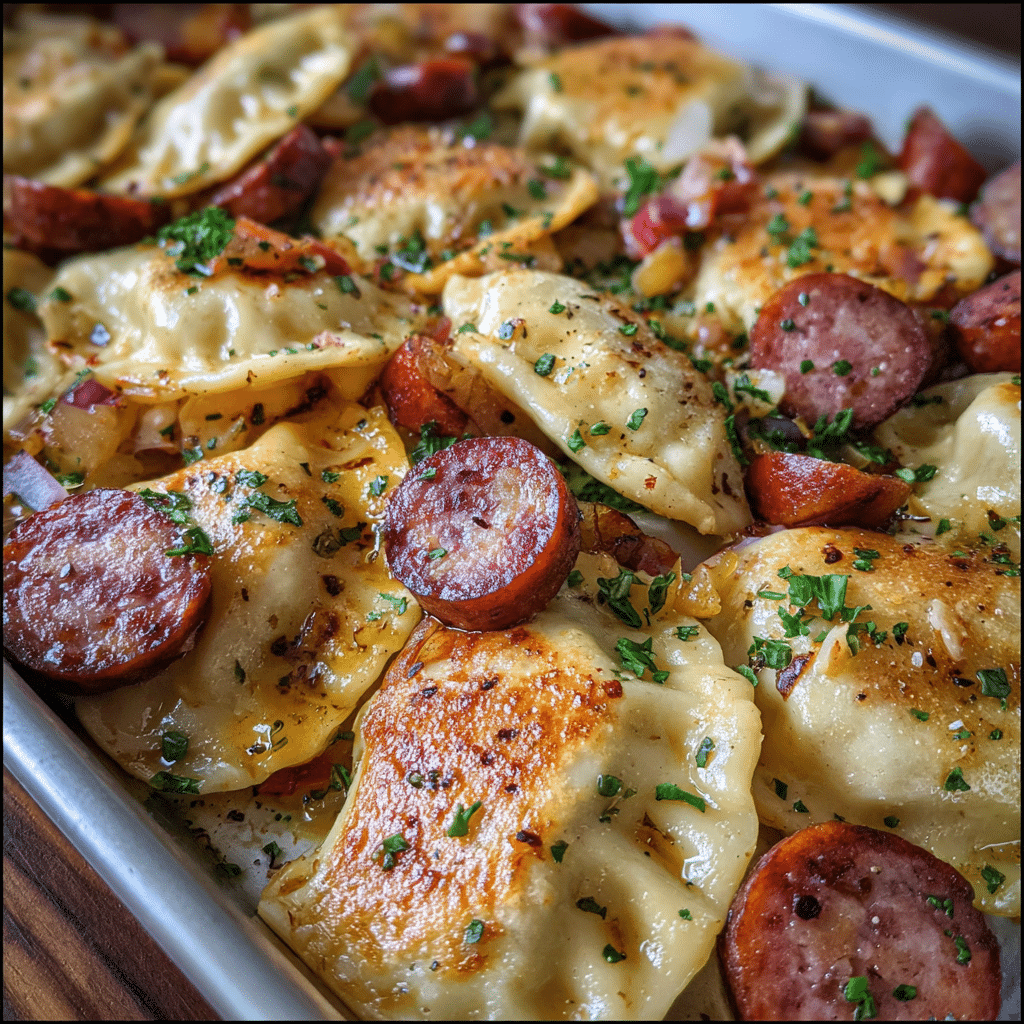
If you’re craving a quick, satisfying dinner that combines hearty flavors and requires minimal cleanup, this Sheet Pan Pierogies and Kielbasa recipe is an absolute game-changer. Packed with tender pierogies, smoky kielbasa, and vibrant veggies all roasted together on one pan, it’s a foolproof meal that brings comfort and convenience to your weekday table. Whether you’re feeding the family or meal prepping for the week, this dish delivers on taste and simplicity every single time.
Why You’ll Love This Recipe
- Effortless Cleanup: Everything cooks on a single sheet pan, so you spend less time washing dishes and more time enjoying your meal.
- Speedy Preparation: With minimal chopping and just a few ingredients, it comes together quickly for busy weeknights.
- Flavor-Packed: The combination of savory kielbasa and crispy, golden pierogies is irresistibly delicious.
- Flexible Ingredients: It’s easy to swap in your favorite vegetables or protein for a customized dinner experience.
- Family-Friendly: This comforting meal appeals to all ages, making it perfect for kids and adults alike.
Ingredients You’ll Need
This recipe uses simple, wholesome ingredients that each bring their own magic to the dish—from the satisfying chew of the pierogies to the smoky kick of the kielbasa and the fresh crunch of roasted vegetables.
- Pierogies: Frozen or fresh cheese or potato pierogies work best for that tender-yet-crispy texture.
- Kielbasa: Smoked kielbasa slices add rich, savory flavor and a hearty protein boost.
- Bell Peppers: Red and green peppers add vibrant color and a touch of sweetness to the pan.
- Onion: Yellow or sweet onion infuses a gentle caramelized flavor as it roasts.
- Olive Oil: A drizzle helps everything crisp up beautifully and brings flavors together.
- Garlic Powder: Adds subtle warmth without overpowering the dish.
- Smoked Paprika: Provides a gentle smoky depth that complements the kielbasa perfectly.
- Salt and Pepper: Essential for seasoning and bringing all the flavors into balance.
- Fresh Parsley (optional): Brightens the dish with a fresh, herbal note when sprinkled before serving.
Variations for Sheet Pan Pierogies and Kielbasa
One of the best parts about this recipe is how easy it is to personalize. Whether you’re looking to swap out ingredients due to dietary preferences or just want to try something new, here are some tasty variations to consider.
- Vegetarian Swap: Replace kielbasa with plant-based sausage or extra veggies for a meat-free option.
- Different Pierogies: Try sauerkraut, mushroom, or meat-filled pierogies to mix up the flavors.
- Extra Veggies: Add zucchini, cherry tomatoes, or mushrooms for more color and nutrients.
- Spice it Up: Add a pinch of crushed red pepper flakes or cayenne for a bit of heat.
- Cheesy Finish: Sprinkle shredded cheddar or mozzarella over the pan in the last five minutes of baking for gooey indulgence.

How to Make Sheet Pan Pierogies and Kielbasa
Step 1: Preheat and Prepare
Start by preheating your oven to 400°F (200°C). Line a large baking sheet with parchment paper or lightly grease it to prevent sticking.
Step 2: Prep Ingredients
Slice the kielbasa into ½-inch thick rounds. Chop the bell peppers and onion into bite-sized pieces to ensure even roasting. If using frozen pierogies, you can leave them as is; fresh pierogies require no thawing either.
Step 3: Toss Everything Together
In a large bowl, combine the pierogies, kielbasa slices, peppers, and onions. Drizzle with olive oil, then sprinkle garlic powder, smoked paprika, salt, and pepper on top. Toss everything well to ensure each piece is evenly coated with seasoning.
Step 4: Arrange on the Sheet Pan
Spread the mixture out on the prepared baking sheet in a single layer. Make sure there’s enough space between pieces for the heat to circulate, which helps them brown and crisp up nicely.
Step 5: Bake Until Golden and Crispy
Place the sheet pan in the preheated oven and bake for 25-30 minutes, flipping halfway through. You’ll want the pierogies to be golden with crispy edges, and the kielbasa and veggies cooked through but still juicy.
Step 6: Add Fresh Garnish and Serve
Once out of the oven, sprinkle chopped fresh parsley over the pan for a burst of color and freshness before serving immediately.
Pro Tips for Making Sheet Pan Pierogies and Kielbasa
- Don’t Overcrowd the Pan: Giving ingredients space allows for maximum crispiness and even cooking.
- Flip Carefully: Use a spatula to turn pierogies and kielbasa halfway through for uniform browning.
- Use Olive Oil Generously: A good coating helps with crisping and adds a lovely flavor.
- Customize Seasonings: Feel free to adjust spices according to your taste preferences for a personalized twist.
- Check Pierogie Type: Some frozen pierogies cook faster than homemade, so keep an eye to prevent overcooking.
How to Serve Sheet Pan Pierogies and Kielbasa
Garnishes
Fresh parsley adds a pop of green and brightness, but sour cream is a classic accompaniment that pairs beautifully with the pierogies, offering a cooling contrast to the savory sausage and spices.
Side Dishes
This dish is hearty on its own, but if you want to round out the meal, consider a simple green salad or steamed vegetables. For heartier appetites, roasted potatoes or a creamy cucumber salad complement nicely.
Creative Ways to Present
Serve the pierogies and kielbasa on a rustic wooden board with small bowls of mustard, sour cream, and pickles for a fun, family-style dinner. Alternatively, layer them over a bed of sautéed greens for an elegant presentation.
Make Ahead and Storage
Storing Leftovers
Place leftover Sheet Pan Pierogies and Kielbasa in an airtight container and store it in the refrigerator for up to 3 days to keep flavors fresh.
Freezing
You can freeze leftovers by spreading cooled pieces on a baking sheet, freezing until firm, then transferring them to a zip-top bag for up to 2 months. This prevents sticking and keeps the dish fresh.
Reheating
For best texture, reheat leftovers in a skillet over medium heat or bake in the oven at 350°F (175°C) until warmed through and crispy again, avoiding sogginess from the microwave.
FAQs
Can I use homemade pierogies for this recipe?
Absolutely! Homemade pierogies work wonderfully and may even bring extra flavor and freshness; just watch the cooking time as they might cook faster than frozen ones.
What type of kielbasa is best?
Smoked kielbasa is preferred for its rich, savory taste that complements the pierogies perfectly, but any variety you like can be used depending on your flavor preference.
Is this recipe gluten-free?
Traditional pierogies contain wheat, so for a gluten-free version, look for pierogies specifically made with gluten-free flour alternatives or try a different potato or gnocchi substitute.
Can I add more vegetables to this dish?
Yes! Adding extra veggies like zucchini, cherry tomatoes, or mushrooms is a great way to customize the recipe and boost nutrition while keeping it on one sheet pan.
What can I serve as a sauce with Sheet Pan Pierogies and Kielbasa?
Sour cream is the classic choice, but mustard, a creamy horseradish sauce, or even a tangy yogurt dip complement the flavors nicely and add variety.
Final Thoughts
Sheet Pan Pierogies and Kielbasa is one of those rare recipes that feels like a comforting hug with every bite and fits perfectly into busy evenings when time and energy are limited. Its simple ingredients, straightforward process, and delightful flavors make this a family favorite you’ll come back to again and again. Go ahead and try it tonight—you’ll fall in love with how easy and delicious dinner can be!
Related Posts
PrintSheet Pan Pierogies and Kielbasa
Sheet Pan Pierogies and Kielbasa is a quick and satisfying one-pan dinner combining tender, crispy pierogies with smoky kielbasa and vibrant roasted vegetables. This easy, flavorful recipe requires minimal prep and cleanup, perfect for busy weeknights or meal prepping, while offering comforting, hearty flavors that the whole family will love.
- Prep Time: 10 minutes
- Cook Time: 25-30 minutes
- Total Time: 35-40 minutes
- Yield: 4 servings 1x
- Category: Main Course
- Method: Baking
- Cuisine: American
- Diet: Gluten Free (if gluten-free pierogies are used)
Ingredients
Main Ingredients
- 12 oz frozen or fresh cheese or potato pierogies
- 12 oz smoked kielbasa, sliced into ½-inch rounds
- 1 red bell pepper, chopped into bite-sized pieces
- 1 green bell pepper, chopped into bite-sized pieces
- 1 yellow or sweet onion, chopped into bite-sized pieces
Seasonings and Extras
- 2 tablespoons olive oil
- 1 teaspoon garlic powder
- 1 teaspoon smoked paprika
- Salt and pepper, to taste
- Fresh parsley, chopped (optional, for garnish)
Instructions
- Preheat and Prepare: Preheat your oven to 400°F (200°C). Line a large baking sheet with parchment paper or lightly grease it to prevent sticking.
- Prep Ingredients: Slice the kielbasa into ½-inch thick rounds. Chop the bell peppers and onion into bite-sized pieces for even roasting. No need to thaw frozen pierogies; fresh pierogies also require no thawing.
- Toss Everything Together: In a large bowl, combine the pierogies, kielbasa slices, chopped peppers, and onions. Drizzle with olive oil, then sprinkle garlic powder, smoked paprika, salt, and pepper over the mixture. Toss well to evenly coat every piece with seasoning.
- Arrange on the Sheet Pan: Spread the mixture out in a single layer on the prepared baking sheet, ensuring there’s enough space between pieces for heat circulation to promote browning and crispiness.
- Bake Until Golden and Crispy: Bake in the preheated oven for 25-30 minutes, flipping everything halfway through. The pierogies should be golden with crispy edges, while the kielbasa and veggies are cooked through but still juicy.
- Add Fresh Garnish and Serve: Once out of the oven, sprinkle chopped fresh parsley over the dish for color and freshness. Serve immediately.
Notes
- Don’t overcrowd the pan; leave space for crispiness and even cooking.
- Flip pierogies and kielbasa carefully halfway through baking for uniform browning.
- Use olive oil generously to help with crisping and flavor.
- Customize seasonings to your taste, such as adding crushed red pepper flakes for heat.
- Keep an eye on cooking times, especially if using homemade or different types of pierogies, as they may cook faster than frozen ones.
Nutrition
- Serving Size: 1/4 recipe
- Calories: 450 kcal
- Sugar: 5 g
- Sodium: 850 mg
- Fat: 22 g
- Saturated Fat: 7 g
- Unsaturated Fat: 13 g
- Trans Fat: 0 g
- Carbohydrates: 40 g
- Fiber: 4 g
- Protein: 18 g
- Cholesterol: 50 mg
Keywords: pierogies, kielbasa, sheet pan dinner, one-pan meal, easy dinner, roasted vegetables, family-friendly, quick meal