How to Make Baked Apple Pie Rice Paper Rolls
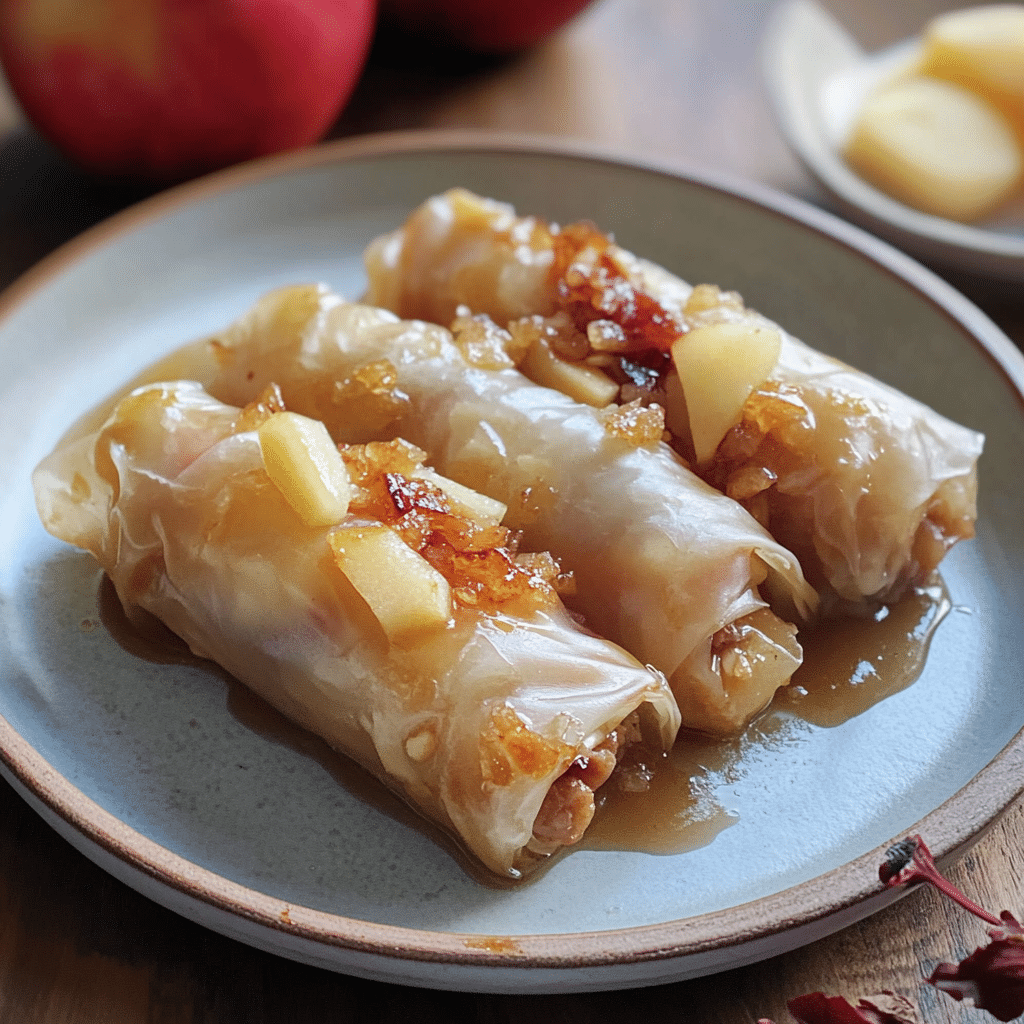
Discover a sweet twist with Baked Apple Pie Rice Paper Rolls, a delightful dessert that combines the comforting flavors of apple pie with the crispiness of baked rice paper. These rolls bring together warm, cinnamon-spiced apples and sweet notes of sugar, all wrapped up in a light, crunchy casing. Perfect for any occasion, from family dinners to festive gatherings, these rolls are easy to prepare and absolutely delicious, transforming a classic dessert into a fun, hand-held treat.
Why You’ll Love This Recipe
- A delightful twist: Combines traditional apple pie flavors with a crispy rice paper exterior for a fresh dessert experience.
- Easy to make: Requires simple ingredients and straightforward steps, perfect for bakers of all levels.
- Light and crispy: Baking instead of frying gives a healthier, less oily treat without sacrificing crunch.
- Perfect portion size: These rolls are ideal for serving at parties or as a quick snack without any mess.
- Customizable filling: Easily adapt the spice levels or add nuts for extra texture and flavor.
Ingredients You’ll Need
Each ingredient in this recipe plays an essential role, from juicy apples that add natural sweetness to fragrant spices that elevate the flavor profile. The rice paper provides a light, crispy texture that beautifully contrasts the soft filling inside.
- Granny Smith apples: Tart and firm, they hold their shape well when cooked and balance the sweetness.
- Cinnamon: Adds warmth and a classic apple pie aroma that makes every bite comforting.
- Brown sugar: Deep, caramel-like sweetness enhances the apples without overpowering them.
- Butter: Used for cooking the filling to add richness and help caramelize the apples.
- Rice paper sheets: Thin and delicate, providing the perfect crisp texture when baked.
- Lemon juice: Keeps the apples from browning and adds a subtle citrus brightness.
- Nutmeg (optional): A pinch adds complexity and enhances the spicy notes.
- Vanilla extract: Boosts the overall sweetness and aroma of the filling.
Variations for Baked Apple Pie Rice Paper Rolls
Feel free to personalize your Baked Apple Pie Rice Paper Rolls based on your taste, dietary preferences, or what you have on hand in your kitchen. This recipe is flexible and welcomes creativity.
- Nutty addition: Add chopped walnuts or pecans to the filling for added crunch and flavor.
- Gluten-free option: The recipe is naturally gluten-free, but always check your rice paper packaging to ensure compliance.
- Fruit mix-up: Substitute or add diced pears or berries for a different fruity twist.
- Sweetener swap: Use maple syrup or honey instead of brown sugar for a natural sweetener alternative.
- Spice variations: Try cardamom or allspice to deepen the flavor complexity.

How to Make Baked Apple Pie Rice Paper Rolls
Step 1: Prepare the Apple Filling
Begin by peeling, coring, and dicing your apples into small pieces. In a pan, melt the butter over medium heat, then add the apples, brown sugar, cinnamon, lemon juice, vanilla extract, and a pinch of nutmeg if using. Cook the mixture until the apples soften and the sugar caramelizes slightly, about 7-10 minutes. Remove from heat and allow it to cool before filling the rolls.
Step 2: Soften the Rice Paper Sheets
Fill a large shallow dish with warm water. Submerge one rice paper sheet at a time for about 10 to 15 seconds, until it becomes soft and pliable but not too soggy. Lay the softened sheet flat on a clean surface or a damp towel.
Step 3: Fill and Roll
Place a generous spoonful of the cooled apple filling near the bottom edge of the rice paper. Fold in the sides and then roll up tightly, ensuring the filling is sealed inside. Repeat the process for all the sheets.
Step 4: Bake to Crispy Perfection
Preheat your oven to 375°F (190°C). Arrange the rolls seam-side down on a baking sheet lined with parchment paper. Lightly brush or spray the rolls with melted butter or oil to enhance browning. Bake for 15-20 minutes until the rolls turn golden and crisp.
Step 5: Cool and Serve
Remove from oven and allow the rolls to cool for a few minutes so the filling sets slightly. Serve warm for the best texture and flavor.
Pro Tips for Making Baked Apple Pie Rice Paper Rolls
- Use tart apples: Their firm texture holds up well during cooking, preventing a mushy filling.
- Do not over-soak rice paper: Avoid sogginess by keeping soaking time short and handling gently.
- Seal well: Ensure you tuck the sides in tightly when rolling to prevent filling leakage while baking.
- Brush with fat: Use melted butter or oil on rice paper before baking for enhanced flavor and crispiness.
- Cool briefly before serving: This keeps the rolls crisp and avoids burning your mouth on hot filling.
How to Serve Baked Apple Pie Rice Paper Rolls
Garnishes
Sprinkle powdered sugar or cinnamon sugar lightly over the rolls to add a delightful presentation and an extra touch of sweetness.
Side Dishes
Serve alongside vanilla ice cream or a dollop of whipped cream to complement the warmth and spices of the apple pie filling beautifully.
Creative Ways to Present
Arrange the rolls on a rustic wooden board or a beautiful platter and drizzle with caramel sauce or honey for an inviting, cozy dessert display.
Make Ahead and Storage
Storing Leftovers
Store any leftover Baked Apple Pie Rice Paper Rolls in an airtight container at room temperature for up to 1 day to maintain crispness and flavor.
Freezing
Freeze unbaked rolls on a tray until firm, then transfer to a freezer-safe bag for up to 1 month. Bake directly from frozen, adding a few extra minutes to the baking time.
Reheating
Reheat leftover rolls in a preheated oven at 350°F (175°C) for 5-7 minutes to restore crispness, avoiding the microwave which can make them soggy.
FAQs
Can I make Baked Apple Pie Rice Paper Rolls vegan?
Yes! Swap butter for coconut oil or vegan margarine and ensure your rice paper sheets are vegan-friendly for a delicious plant-based version.
What type of rice paper should I use?
Use round rice paper made for fresh spring rolls, which softens quickly and crisps nicely when baked or fried.
Can I prepare these rolls ahead of time?
Absolutely! You can assemble them and refrigerate for a few hours before baking, or freeze them unbaked for longer storage.
Is it possible to fry these rolls instead of baking?
Yes, frying will give you an even crunchier texture but will add extra oil and calories compared to baking.
How do I prevent the rolls from breaking while rolling?
Soak the rice paper just until pliable and work gently on a clean surface; do not overfill to avoid tearing or bursting.
Final Thoughts
These Baked Apple Pie Rice Paper Rolls offer a fun, irresistible way to enjoy the classic flavors of apple pie with a crispy, handheld twist. With simple ingredients and easy steps, anyone can whip up this crowd-pleasing dessert that’s perfect for sharing or treating yourself. I encourage you to give this recipe a try and watch it become a new favorite in your kitchen!
Related Posts
- Why Hidden Rainbow Cookies Are Irresistible Treats
- How to Make Protein Yogurt Pudding Fast
- Easy No-Bake Cheesecake Jars for Summer
Baked Apple Pie Rice Paper Rolls

Baked Apple Pie Rice Paper Rolls are a delightful dessert that melds warm, cinnamon-spiced apples with the crispiness of baked rice paper. These light, crunchy rolls offer a fun twist on classic apple pie flavors, perfect for any occasion. Easy to prepare with simple ingredients, they provide a healthier alternative by baking rather than frying and can be customized to suit your taste.
- Prep Time: 15 minutes
- Cook Time: 20 minutes
- Total Time: 35 minutes
- Yield: 8-10 rolls 1x
- Category: Dessert
- Method: Baking
- Cuisine: American
- Diet: Gluten Free
Ingredients
Filling Ingredients
- 3 Granny Smith apples, peeled, cored, and diced
- 2 tablespoons butter
- 1/4 cup brown sugar
- 1 teaspoon cinnamon
- 1 tablespoon lemon juice
- 1 teaspoon vanilla extract
- Pinch of nutmeg (optional)
Assembly Ingredients
- 8–10 rice paper sheets
- Melted butter or oil for brushing
Instructions
- Prepare the Apple Filling: Peel, core, and dice the apples into small pieces. Melt butter in a pan over medium heat, add apples, brown sugar, cinnamon, lemon juice, vanilla extract, and nutmeg if using. Cook until apples soften and sugar caramelizes slightly, about 7-10 minutes. Remove from heat and let cool.
- Soften the Rice Paper Sheets: Submerge one rice paper sheet at a time in a shallow dish filled with warm water for 10 to 15 seconds until soft and pliable but not soggy. Lay flat on a clean surface or damp towel.
- Fill and Roll: Place a generous spoonful of cooled apple filling near the bottom edge of the rice paper. Fold in the sides and roll tightly, sealing the filling inside. Repeat for all sheets.
- Bake to Crispy Perfection: Preheat oven to 375°F (190°C). Place rolls seam-side down on a parchment-lined baking sheet. Lightly brush or spray rolls with melted butter or oil. Bake for 15-20 minutes until golden and crisp.
- Cool and Serve: Remove from oven and let rolls cool for a few minutes so filling sets slightly. Serve warm for best flavor and texture.
Notes
- Use tart apples like Granny Smith for a firm texture that holds up well during cooking.
- Do not over-soak rice paper to avoid sogginess; keep soaking time short and handle gently.
- Seal the rolls tightly to prevent filling leaks while baking.
- Brush rice paper with melted butter or oil before baking for enhanced flavor and crunch.
- Allow rolls to cool briefly before serving to keep crispness and avoid hot filling burns.
Nutrition
- Serving Size: 1 roll
- Calories: 120
- Sugar: 12g
- Sodium: 30mg
- Fat: 4g
- Saturated Fat: 2.5g
- Unsaturated Fat: 1g
- Trans Fat: 0g
- Carbohydrates: 22g
- Fiber: 2g
- Protein: 1g
- Cholesterol: 10mg
Keywords: apple pie dessert, baked apple rolls, rice paper rolls, gluten-free dessert, cinnamon apple rolls