Homemade Cheez-Its
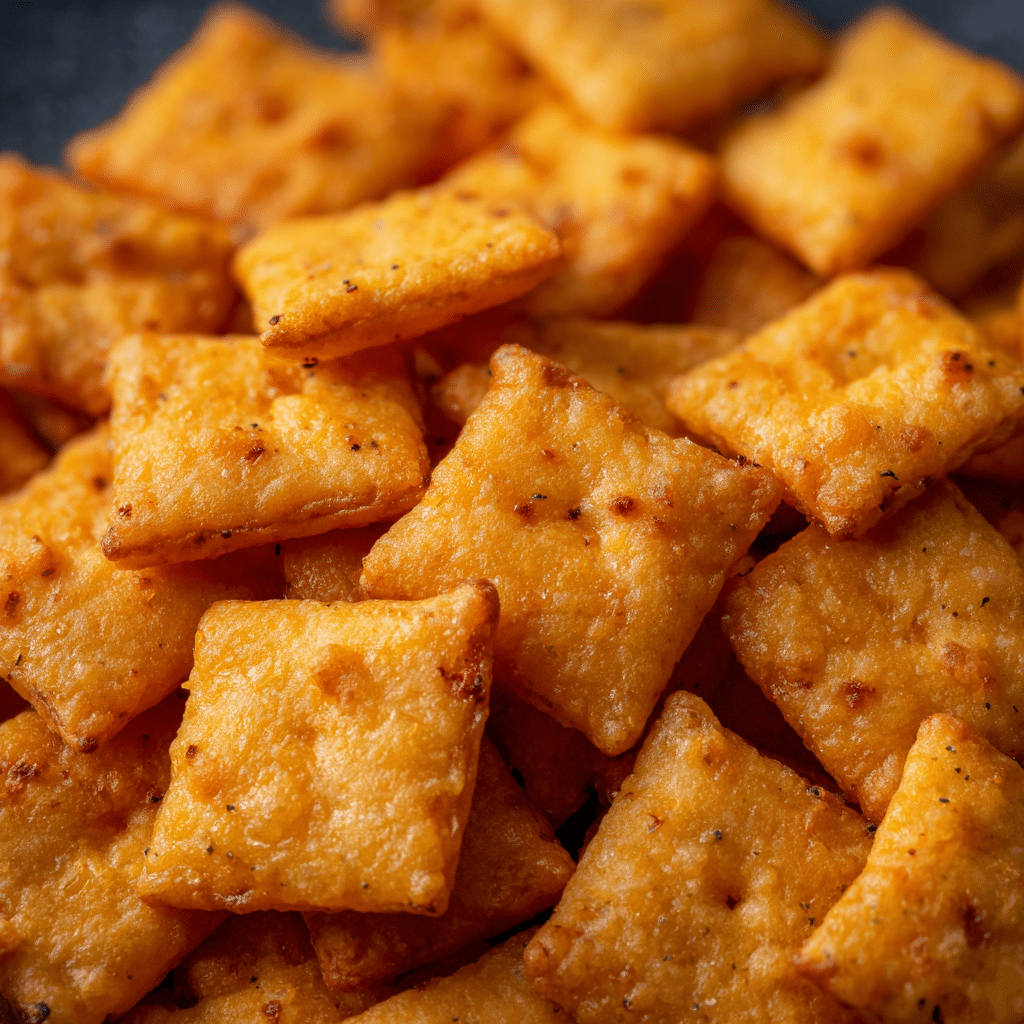
Craving a perfectly cheesy, crunchy snack that feels homemade yet comes together in a flash? Learn how to make delicious Homemade Cheez-Its quickly with this easy recipe that uses simple ingredients to deliver that iconic sharp cheddar flavor and satisfying crunch. Whether for a party, an afternoon pick-me-up, or just because, these Homemade Cheez-Its will be your new favorite go-to snack.
Why You’ll Love This Recipe
- Quick and Easy: Ready in under 30 minutes, perfect for busy days or last-minute snack cravings.
- Fresh Made Flavor: No preservatives or artificial ingredients—just real cheddar cheese and wholesome pantry staples.
- Crunchy Texture: Baked to golden perfection for that satisfying snap with every bite.
- Customizable: Simple tweaks let you adjust the cheese intensity, spice, or even dietary preferences.
- Kid-Friendly: A fresh alternative to store-bought snacks that children (and adults!) love to munch on.
Ingredients You’ll Need
This recipe calls for just a handful of essential ingredients, each contributing to the ultimate cheesy, crispy goodness. From the cheddar that packs the flavor punch to the butter that enriches texture and the spices that add depth, every item matters.
- Sharp Cheddar Cheese: Provides the bold, tangy cheddar taste central to Homemade Cheez-Its.
- All-Purpose Flour: Creates the sturdy base for the dough, offering the right chewiness and structure.
- Unsalted Butter: Adds richness and helps achieve that flaky, golden-baked texture.
- Salt: Enhances all the flavors, balancing the sharpness of the cheese perfectly.
- Water: Just enough to bring the dough together without making it sticky or tough.
- Paprika or Cayenne (optional): Gives a gentle spicy kick if you like a little heat in your snack.
Variations for Homemade Cheez-Its
The beauty of Homemade Cheez-Its lies in their versatility. It’s easy to tailor the recipe to suit your taste buds, dietary restrictions, or adventurous spirit. Feel free to experiment!
- Spicy Cheddar: Add a pinch of cayenne pepper or smoked paprika for a smoky, spicy twist.
- Herb-Infused: Mix dried herbs like rosemary or thyme into your dough for a fragrant, savory touch.
- Gluten-Free Version: Swap all-purpose flour for a gluten-free blend to keep snacks safe for sensitive tummies.
- Vegan Cheese Alternative: Use vegan cheddar and a vegan butter substitute to make these dairy-free but just as delicious.
- Extra Cheesy: Double up on the cheese or add parmesan for a sharper, more intense flavor.

How to Make Homemade Cheez-Its
Step 1: Prepare the Cheese and Dry Ingredients
Grate your sharp cheddar cheese finely to help it incorporate well into the dough. In a large bowl, whisk together the flour, salt, and optional spices to ensure even distribution.
Step 2: Cut in the Butter
Add chilled unsalted butter cut into small cubes to the dry mixture. Use a pastry cutter or your fingertips to blend until the mixture resembles coarse crumbs, which will give you that perfect flaky texture.
Step 3: Add Cheese and Water
Mix the grated cheese into the butter-flour mixture so it’s evenly combined. Slowly pour in cold water, one tablespoon at a time, and knead gently until the dough just comes together without being sticky.
Step 4: Roll Out and Cut
Place the dough between two sheets of parchment paper and roll it out to about 1/8 inch thickness. Using a pizza cutter or sharp knife, cut into small square shapes around 1 inch wide. For the signature look, prick each square lightly with a fork.
Step 5: Bake Until Golden
Arrange the squares on a parchment-lined baking sheet, leaving a bit of space between each. Bake at 350°F (175°C) for 12–15 minutes or until they turn golden and a bit crisp. Let cool completely to firm up that crunch.
Pro Tips for Making Homemade Cheez-Its
- Chill Dough: Refrigerate your dough for at least 30 minutes before rolling out to make handling easier and prevent shrinking during baking.
- Use Sharp Cheese: The sharper the cheddar, the more flavor-packed your Cheez-Its will be, so opt for quality sharp cheddar.
- Keep Even Thickness: Roll your dough evenly for consistent baking and crunch on every cracker.
- Don’t Skip Pricking: Poking holes in each cracker prevents puffing and keeps that classic flat appearance.
- Cool Completely: Allow your crackers to cool fully on a rack before storing to maintain crispness.
How to Serve Homemade Cheez-Its
Garnishes
Sprinkle with a light dusting of smoked paprika or a pinch of flaky sea salt right after baking for an elevated flavor boost and a pop of color that tempts the eyes.
Side Dishes
Serve alongside creamy dips like ranch, hummus, or a spicy cheese spread to complement the crunch and introduce a playful contrast in texture.
Creative Ways to Present
Stack Homemade Cheez-Its in small glass jars for party favors or spread them out on a cheese board accompanied by slices of sharp cheddar and fresh fruit for an inviting snack display.
Make Ahead and Storage
Storing Leftovers
Store your Homemade Cheez-Its in an airtight container at room temperature for up to one week to keep their crispness intact and flavors fresh.
Freezing
If you want to keep them longer, freeze the crackers in a sealed freezer bag for up to two months; thaw at room temperature before serving.
Reheating
To revive that fresh-baked crunch, pop stored crackers in a preheated 300°F oven for 5 minutes—just enough to warm them without burning or drying out.
FAQs
Can I use a different type of cheese?
Absolutely! While sharp cheddar is classic, try gouda, parmesan, or pepper jack for unique flavors that still deliver great crunch and taste.
How long do Homemade Cheez-Its last?
Stored properly in an airtight container at room temperature, they stay fresh and crispy for about a week.
Are Homemade Cheez-Its gluten-free?
The basic recipe uses all-purpose flour, so it’s not gluten-free; however, you can substitute with gluten-free flour blends to accommodate dietary needs.
Can I make these vegan?
Yes! Use vegan cheddar-style shreds and a plant-based butter substitute to make delicious vegan Homemade Cheez-Its.
What if my dough is too sticky?
Add a bit more flour, a teaspoon at a time, until the dough becomes firm enough to roll out without sticking excessively.
Final Thoughts
There’s nothing quite like the satisfaction of biting into a crispy, cheesy Homemade Cheez-Its snack that you made with your own hands—and in a short amount of time too! Whether it’s a quick afternoon treat or a fun party appetizer, this recipe is easy, customizable, and downright delicious. Give it a try and watch these little squares of crunchy joy become an instant favorite in your kitchen.
Related Posts
PrintHomemade Cheez-Its
A quick and easy homemade recipe to make crispy, cheesy Homemade Cheez-Its using sharp cheddar, butter, and simple pantry staples. Perfectly baked to a golden crunch, these snacks are customizable, kid-friendly, and free from preservatives, making them a delicious alternative to store-bought crackers.
- Prep Time: 15 minutes
- Cook Time: 12-15 minutes
- Total Time: 27-30 minutes
- Yield: About 48 crackers (1-inch squares) 1x
- Category: Appetizers
- Method: Baking
- Diet: Gluten Free
Ingredients
Essential Ingredients
- 1 cup Sharp Cheddar Cheese, finely grated
- 1 cup All-Purpose Flour (or gluten-free flour blend for gluten-free version)
- 1/2 cup Unsalted Butter, chilled and cubed
- 1/2 teaspoon Salt
- 2–3 tablespoons Cold Water
Optional Ingredients
- 1/4 teaspoon Paprika or Cayenne Pepper (for a spicy kick)
Instructions
- Prepare the Cheese and Dry Ingredients: Grate your sharp cheddar cheese finely to help it incorporate well into the dough. In a large bowl, whisk together the flour, salt, and optional spices to ensure even distribution.
- Cut in the Butter: Add chilled unsalted butter cut into small cubes to the dry mixture. Use a pastry cutter or your fingertips to blend until the mixture resembles coarse crumbs, which will give you that perfect flaky texture.
- Add Cheese and Water: Mix the grated cheese into the butter-flour mixture so it’s evenly combined. Slowly pour in cold water, one tablespoon at a time, and knead gently until the dough just comes together without being sticky.
- Roll Out and Cut: Place the dough between two sheets of parchment paper and roll it out to about 1/8 inch thickness. Using a pizza cutter or sharp knife, cut into small square shapes around 1 inch wide. For the signature look, prick each square lightly with a fork.
- Bake Until Golden: Arrange the squares on a parchment-lined baking sheet, leaving a bit of space between each. Bake at 350°F (175°C) for 12–15 minutes or until they turn golden and a bit crisp. Let cool completely to firm up that crunch.
Notes
- Chill Dough: Refrigerate your dough for at least 30 minutes before rolling out to make handling easier and prevent shrinking during baking.
- Use Sharp Cheese: The sharper the cheddar, the more flavor-packed your Cheez-Its will be, so opt for quality sharp cheddar.
- Keep Even Thickness: Roll your dough evenly for consistent baking and crunch on every cracker.
- Don’t Skip Pricking: Poking holes in each cracker prevents puffing and keeps that classic flat appearance.
- Cool Completely: Allow your crackers to cool fully on a rack before storing to maintain crispness.
Nutrition
- Serving Size: 6 crackers
- Calories: 110
- Sugar: 0.2g
- Sodium: 180mg
- Fat: 8g
- Saturated Fat: 5g
- Unsaturated Fat: 2.5g
- Trans Fat: 0g
- Carbohydrates: 8g
- Fiber: 0.3g
- Protein: 3g
- Cholesterol: 20mg
Keywords: Homemade Cheez-Its, Cheddar Crackers, Cheesy Snack, Crunchy Snack, Gluten-Free Cheez-Its, Vegan Cheez-Its, Party Snack, Quick Snack