How to Make Meringue Ghost Tarts Easily
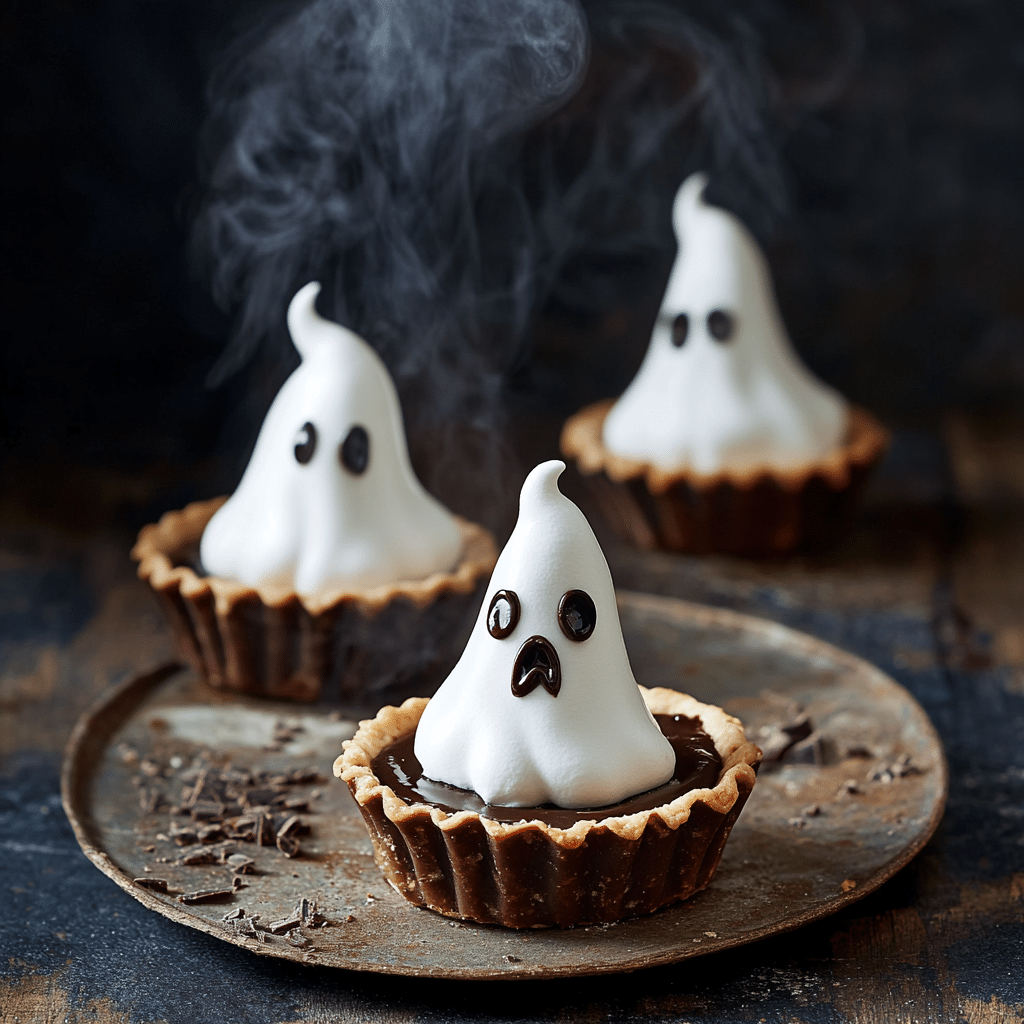
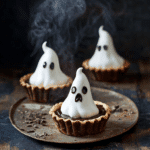
If you’re looking for a fun, spooky, and surprisingly simple treat to make this Halloween, you’ve got to try Meringue Ghost Tarts! These delightful little desserts combine crisp, airy meringue shaped into adorable ghostly figures with a luscious tart base that perfectly balances sweetness and texture. Whether you’re baking for a party, family gathering, or just to enjoy a festive snack at home, Meringue Ghost Tarts offer an impressive yet easy way to celebrate the season with style and taste.
Why You’ll Love This Recipe
- Fun and Festive Presentation: Shaped like ghosts, these tarts add a charming Halloween vibe to your dessert table instantly.
- Simple Ingredients: Made with basic pantry staples, you won’t need any hard-to-find items to whip these up.
- Light and Airy Texture: The meringue topping adds a delicate crunch that perfectly complements the creamy tart filling.
- Great for All Skill Levels: Whether you’re a baking newbie or a pro, this step-by-step recipe makes the process easy and enjoyable.
- Customizable Flavors: You can tweak the filling or the meringue flavor to suit your taste or dietary needs.
Ingredients You’ll Need
The magic behind these Meringue Ghost Tarts lies in using just a few simple ingredients, all essential to building perfect texture, flavor, and that irresistibly spooky look.
- Egg Whites: Fresh egg whites create the fluffy, stable meringue that forms the ghost shapes.
- Granulated Sugar: Sweetens the meringue and helps it hold its stiff peaks perfectly.
- Lemon Juice or Cream of Tartar: These acidic ingredients stabilize the egg whites for a firmer meringue.
- Pre-made Tart Shells: Ready-made shells save time and provide a buttery, crisp base for your ghostly topping.
- Vanilla Extract: A splash enhances the flavor in both the meringue and the tart filling.
- Chocolate Chips or Edible Markers: Perfect for adding ghostly eyes and mouths after baking.
Variations for Meringue Ghost Tarts
This recipe is a fantastic canvas for creativity. Feel free to adjust the flavors and presentation to your liking or dietary preferences without losing that Halloween spirit.
- Chocolate Tart Base: Swap the plain tart shells for chocolate ones to add a rich, decadent flavor twist.
- Flavored Meringue: Add a hint of peppermint or almond extract to the meringue for a fun surprise.
- Vegan Alternative: Use aquafaba (chickpea brine) instead of egg whites to make vegan-friendly meringue ghosts.
- Fruit Filling: Replace traditional custard fillings with fresh berry compote for a tangy contrast.
- Colored Meringue Ghosts: Use natural food colorings like activated charcoal or beet juice to create spooky variations beyond white.

How to Make Meringue Ghost Tarts
Step 1: Prepare Your Tart Shells
Start with pre-made tart shells or bake your own. Make sure they are completely cooled before adding the filling and meringue, so the bottoms stay crisp and don’t get soggy.
Step 2: Whip the Meringue
Using a clean bowl and electric mixer, beat the egg whites until they become frothy. Add lemon juice or cream of tartar, then gradually add sugar while continuing to beat until stiff, glossy peaks form. This step is key to achieving stable and airy meringue ghosts.
Step 3: Fill the Tarts
Fill your tart shells with your chosen filling—classic pastry cream, lemon curd, or a smooth chocolate ganache work beautifully. Smooth the surface evenly to provide a perfect base for the meringue.
Step 4: Pipe the Ghost Shapes
Transfer the meringue to a piping bag fitted with a round tip. Pipe small ghost shapes on top of each tart, creating a little rounded dome with a pointed tip to resemble a ghost’s head and tail.
Step 5: Bake the Tarts
Bake the assembled tarts in a low-temperature oven (around 225°F or 110°C) for about an hour to gently dry out the meringue without browning it. This slow bake ensures the ghosts stay crunchy and hold their shape.
Step 6: Decorate Your Ghosts
Once fully cooled, use mini chocolate chips or edible food markers to draw eyes and mouths on your meringue ghosts, giving each tart its own personality.
Pro Tips for Making Meringue Ghost Tarts
- Room Temperature Eggs: Use egg whites at room temperature to achieve maximum volume when whipping.
- Spotless Bowls: Ensure mixing bowls and beaters are grease-free for the best meringue results.
- Add Sugar Slowly: Gradually adding sugar helps meringue develop shiny, stable peaks.
- Low and Slow Baking: Keep the temperature low when baking the meringue to avoid browning or cracking.
- Use Parchment Paper: Pipe some practice ghosts on parchment to perfect your technique before piping on tarts.
- Cool Completely: Let the tarts and meringue cool completely before decorating to avoid melty eyes and smudges.
How to Serve Meringue Ghost Tarts
Garnishes
Add a sprinkle of powdered sugar or edible glitter for a magical touch, or fresh mint leaves to contrast the sweetness and add a pop of color on the serving plate.
Side Dishes
Serve alongside a warm spiced apple cider or a rich hot chocolate to complement the light and sweet meringue with cozy fall flavors.
Creative Ways to Present
Arrange your Meringue Ghost Tarts on a black or orange platter decorated with candy corn, plastic spiders, or pumpkin-shaped candies to amplify that Halloween vibe at your party or family gathering.
Make Ahead and Storage
Storing Leftovers
Keep your Meringue Ghost Tarts in an airtight container at room temperature for up to 2 days. Avoid refrigeration as moisture can soften the crispy meringue.
Freezing
Freezing is not recommended for these tarts because the texture of the meringue will become soggy upon thawing.
Reheating
If your meringue loses its crispness, place the tarts in a low oven for a few minutes to help restore crunch, but watch carefully to prevent browning.
FAQs
Can I make Meringue Ghost Tarts without a mixer?
While it’s possible to whip egg whites by hand using a whisk, it requires significant time and effort to reach stiff peaks. A hand or stand mixer makes this much easier and faster.
What if my meringue isn’t stiff enough?
Make sure your bowl and beaters are completely clean and dry, add a stabilizer like cream of tartar or lemon juice, and add sugar slowly while beating. Also, avoid any yolk contamination in your whites.
Can I use fresh homemade tart shells instead of store-bought?
Absolutely! Homemade tart shells add a personal touch and can be baked to your preferred level of crispness; just ensure they cool completely before filling.
How do I get the perfect ghost shape?
Use a piping bag with a round tip and practice piping on parchment paper first to get the shape just right before piping on your tarts.
Are Meringue Ghost Tarts gluten-free?
The meringue itself is naturally gluten-free, but make sure to use gluten-free tart shells or make your own with gluten-free flour to keep the whole recipe gluten-free.
Final Thoughts
Meringue Ghost Tarts are a whimsical and tasty way to celebrate Halloween with minimal fuss but maximum fun. Their airy meringue “ghosts” perched atop crisp tart shells are sure to impress your friends and family. So, grab your ingredients, preheat your oven, and dive into this delightful recipe—you’ll love how easy it is to bring a bit of spooky charm to your kitchen and your dessert table!
Related Posts
- Easy Apple Coffee Cake with Cinnamon Streusel Recipe
- Easy Apple Crisp with Oats and Cinnamon Recipe
- Irresistible Sour Cream Apple Pie with Brown Sugar Streusel
Meringue Ghost Tarts
Meringue Ghost Tarts are a fun and festive Halloween dessert featuring airy, crisp meringue shaped like adorable ghosts atop a luscious tart base. This easy-to-make treat combines simple pantry ingredients with a delightful texture contrast, making it perfect for parties, family gatherings, or seasonal snacking. Customize flavors and presentation to suit your taste or dietary needs while impressing guests with spooky style and delicious flavor.
- Prep Time: 20 minutes
- Cook Time: 60 minutes
- Total Time: 1 hour 20 minutes
- Yield: 6 tarts 1x
- Category: Dessert
- Method: Baking
- Cuisine: American
- Diet: Gluten Free
Ingredients
Meringue
- 4 fresh egg whites (room temperature)
- 1 cup granulated sugar
- 1/2 teaspoon lemon juice or cream of tartar
- 1 teaspoon vanilla extract
Tart Base and Filling
- 6 pre-made tart shells (plain or chocolate)
- 1 cup pastry cream, lemon curd, or chocolate ganache (for filling)
- 1 teaspoon vanilla extract (optional, for filling)
Decoration
- Mini chocolate chips or edible food markers (for eyes and mouths)
Instructions
- Prepare Your Tart Shells: Start with pre-made tart shells or bake your own. Ensure they are completely cooled before adding the filling and meringue to keep the bottoms crisp and prevent sogginess.
- Whip the Meringue: Using a clean, grease-free bowl and an electric mixer, beat the egg whites until frothy. Add lemon juice or cream of tartar to stabilize, then gradually add sugar while continuing to beat until stiff, glossy peaks form. Stir in vanilla extract for flavor.
- Fill the Tarts: Spoon your chosen filling—pastry cream, lemon curd, or chocolate ganache—into the cooled tart shells. Smooth the surface to create an even base for the meringue topping.
- Pipe the Ghost Shapes: Transfer the meringue to a piping bag fitted with a round tip. Pipe small ghost shapes on top of each filled tart, forming a rounded dome with a pointed tip that resembles a ghost’s head and tail.
- Bake the Tarts: Place the assembled tarts in a low-temperature oven set to 225°F (110°C) and bake for about 1 hour. This slow baking gently dries out the meringue without browning, ensuring a crunchy texture that holds its shape.
- Decorate Your Ghosts: Once completely cooled, use mini chocolate chips or edible markers to draw eyes and mouths on each meringue ghost, giving them spooky personality and charm.
Notes
- Use egg whites at room temperature for maximum volume when whipping.
- Ensure mixing bowls and beaters are completely clean and grease-free for best meringue results.
- Add sugar gradually to develop shiny, stable peaks.
- Bake meringue at low temperature to avoid browning or cracking.
- Practice piping ghost shapes on parchment paper before decorating tarts.
- Cool tarts and meringue completely before decorating to prevent smudging.
- Store tarts at room temperature in an airtight container for up to 2 days; refrigeration will soften the meringue.
- Freezing is not recommended as it affects meringue texture.
- If meringue loses crispness, reheat briefly in a low oven to restore crunch but watch carefully.
- Use gluten-free tart shells for a fully gluten-free dessert.
Nutrition
- Serving Size: 1 tart
- Calories: 230
- Sugar: 22g
- Sodium: 50mg
- Fat: 8g
- Saturated Fat: 5g
- Unsaturated Fat: 2g
- Trans Fat: 0g
- Carbohydrates: 33g
- Fiber: 0.5g
- Protein: 3g
- Cholesterol: 0mg
Keywords: Halloween dessert, meringue tart, spooky treat, ghost meringue, easy Halloween recipe, gluten free dessert

