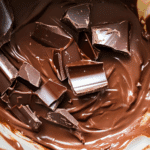
Tempered Chocolate
Master the art of tempered chocolate with this easy step-by-step guide to achieve glossy, smooth, and perfectly set chocolate every time. Learn how to temper chocolate like a professional to create desserts and candies with a stunning shine, crisp snap, and melt-in-your-mouth texture.
- Prep Time: 10 minutes
- Cook Time: 15 minutes
- Total Time: 25 minutes
- Yield: Depends on chocolate quantity used
- Category: Desserts
- Method: Tempering
- Cuisine: International
- Diet: Gluten Free
Ingredients
Essential Ingredients
- High-quality couverture chocolate or chocolate with at least 55% cocoa content (quantity as needed)
- Optional: Pure cocoa butter (quantity as needed)
Equipment
- Heat source: double boiler or microwave-safe bowl
- Digital thermometer
- Clean, dry utensils and bowls
Instructions
- Chop and Prepare the Chocolate: Finely chop the chocolate into small, uniform pieces to ensure even melting. Make sure all working bowls and utensils are completely dry to prevent chocolate from seizing.
- Melt Two-Thirds of the Chocolate: Gently melt about two-thirds of the chocolate using a double boiler or microwave, stirring constantly. Heat slowly to avoid burning, reaching 45-50°C (113-122°F) for dark chocolate, or slightly lower for milk and white varieties.
- Cool the Chocolate: Remove from heat and gradually add the remaining un-melted chocolate, stirring continuously. This lowers the temperature to around 27-28°C (80-82°F) and initiates proper crystal formation.
- Reheat Slightly: Gently reheat the chocolate to the working temperature: 31-32°C (88-90°F) for dark, 29-30°C (84-86°F) for milk, and 28-29°C (82-84°F) for white chocolate without exceeding these temperatures to ensure a shiny, firm finish.
- Test the Temper: Spread a small amount on parchment paper or a countertop edge and let it cool. If it hardens evenly with glossy finish and firm snap, the tempered chocolate is ready.
- Use Immediately: Work quickly by dipping, molding, or coating your treats while the chocolate is at working temperature, before it cools and sets.
Notes
- Patience is key: take your time melting and cooling to avoid burning or dulling the chocolate.
- Use a digital thermometer for precise temperature control and consistent results.
- Avoid water contact as even a small droplet can seize the chocolate; keep everything dry.
- Work in small batches to maintain temperature control and avoid waste.
- Stir frequently during melting and cooling to evenly distribute heat and promote proper crystal formation.
Nutrition
- Serving Size: Per 100g
- Calories: 500
- Sugar: 50g
- Sodium: 10mg
- Fat: 30g
- Saturated Fat: 18g
- Unsaturated Fat: 12g
- Trans Fat: 0g
- Carbohydrates: 60g
- Fiber: 5g
- Protein: 7g
- Cholesterol: 0mg
Keywords: tempered chocolate, chocolate tempering, glossy chocolate, chocolate recipe, chocolatier technique, tempered chocolate melting, chocolate coating
Find it online: https://mealsbylina.com/tempered-chocolate/
