How to Make White Chocolate Ghosts Easily
Get ready to delight your friends and family with a fun and festive treat that’s as charming as it is delicious—White Chocolate Ghosts! This easy-to-make recipe brings the perfect balance of creamy sweetness and spooky fun, ideal for Halloween parties, cozy fall gatherings, or even just a playful snack. Whether you’re new to candy making or a seasoned pro, these adorable white chocolate ghosts will surely bring a smile to everyone’s face.
Why You’ll Love This Recipe
- Simple ingredients: You only need a handful of common pantry staples that come together quickly.
- Quick preparation: From start to finish, this recipe is perfect for busy days or last-minute celebrations.
- Kid-friendly fun: Making White Chocolate Ghosts is a delightful activity for children and adults alike.
- Customizable design: Easy to personalize with different decorations or flavors to suit your taste or theme.
- Perfect festive treat: These ghosts add a charming seasonal touch to any party table or gift bag.
Ingredients You’ll Need
Each ingredient in this White Chocolate Ghosts recipe contributes to the creamy texture, sweet flavor, and festive appearance, making the process both straightforward and satisfying.
- White chocolate chips or bars: The base of your ghosts, offering that rich, velvety sweetness essential for flavor and structure.
- Mini chocolate chips: Perfect for the eyes and mouth, giving your ghosts a cute and expressive face.
- Parchment paper or silicone mat: Essential for shaping and preventing sticking during the cooling process.
- Wax paper or plastic bags: Useful for piping chocolate details or smoothing shapes.
- Optional flavorings: Such as vanilla extract or almond extract, to enhance the overall taste subtly.
Variations for White Chocolate Ghosts
Feel free to make this recipe your own by trying different twists and adjustments, whether it’s dietary modifications or creative alternatives—each adds a unique charm to the end result.
- Dairy-free options: Use vegan white chocolate or coconut-based chocolate alternatives to suit lactose sensitivity.
- Colored ghosts: Add a few drops of food coloring to melt the white chocolate for fun, tinted variations like pastel green or purple.
- Flavored ghosts: Mix peppermint or orange extract into the melted chocolate for seasonal flair.
- Decorations upgrade: Swap mini chocolate chips for edible eyes or draw faces with colored icing pens.
- Chocolate mix: Combine white and dark chocolate layers for a two-tone effect that’s both spooky and stylish.

How to Make White Chocolate Ghosts
Step 1: Melt the White Chocolate
Begin by gently melting your white chocolate chips or bars in a microwave-safe bowl or using a double boiler. Heat in short bursts of 15-20 seconds, stirring well after each interval to prevent burning and ensure a smooth, glossy texture.
Step 2: Prepare Your Work Surface
While the chocolate is melting, lay out parchment paper or a silicone baking mat on a flat surface. This will serve as your canvas for creating the ghost shapes, helping them cool evenly and avoid sticking.
Step 3: Create Ghost Shapes
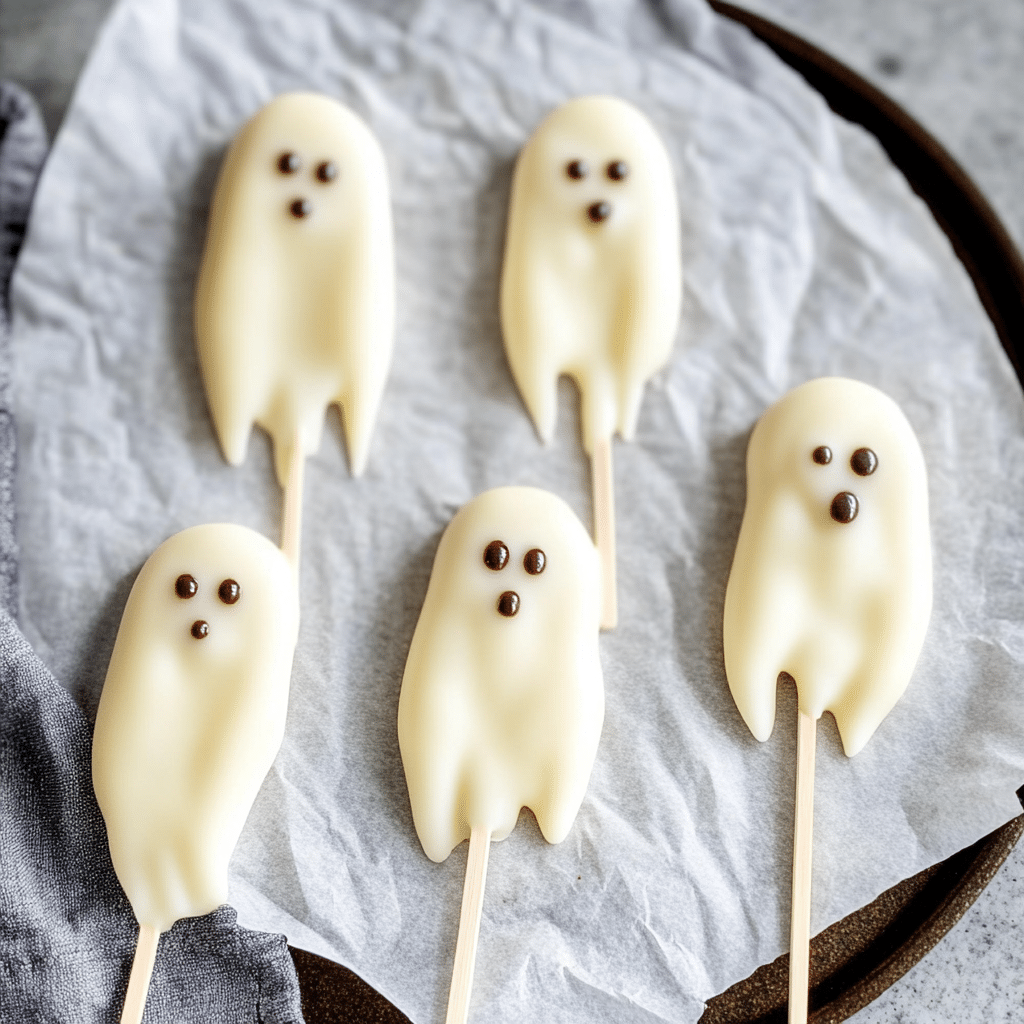
Using a spoon or piping bag, carefully spoon or pipe small ghost shapes onto the prepared surface, making puffed oval forms with slight drips on the bottom edges to mimic a floating ghost. Don’t worry about perfect precision—the irregularity adds character!
Step 4: Add Facial Features
Place mini chocolate chips strategically on each ghost to form eyes and a small mouth for an adorable expression. Press gently so they adhere to the melting chocolate but keep their shape.
Step 5: Chill to Set
Place your tray of ghosts in the refrigerator for about 20-30 minutes, or until the chocolate has fully hardened. This step is key to ensuring the ghosts hold their shape and are easy to handle.
Step 6: Serve or Store
Once set, carefully transfer the White Chocolate Ghosts to a serving plate or airtight container. They’re ready to enjoy immediately or store for later.
Pro Tips for Making White Chocolate Ghosts
- Use quality chocolate: Higher-quality white chocolate melts smoother and tastes creamier, enhancing the final flavor.
- Don’t overheat chocolate: Overheating causes chocolate to seize, so melt it carefully and stir frequently.
- Room temperature tools: Use room temperature bowls and utensils for easier melting and shaping.
- Even spacing: Leave enough space between ghost shapes on the parchment to prevent them from sticking together as they set.
- Personalize faces: Experiment with mini chocolate chips or edible markers to make some ghosts spooky, silly, or sweet.
How to Serve White Chocolate Ghosts
Garnishes
Sprinkle your White Chocolate Ghosts with a dusting of edible glitter, crushed peppermint, or tiny candy pumpkins for an extra festive look that elevates the presentation.
Side Dishes
Pair these creamy treats with spiced hot cocoa, pumpkin-flavored cookies, or caramel apples to complete your Halloween or autumn-themed spread perfectly.
Creative Ways to Present
Arrange White Chocolate Ghosts in clear treat bags tied with ribbon for party favors, display them on tiered trays for buffet style, or nestle them among fall leaves and mini gourds for a charming centerpiece.
Make Ahead and Storage
Storing Leftovers
Keep your White Chocolate Ghosts fresh by storing them in an airtight container in a cool, dry place. Avoid refrigerating unless your home is particularly warm, as humidity can affect the chocolate’s texture.
Freezing
These ghosts freeze well for up to one month. Place them in a single layer on a parchment-lined tray before freezing, then transfer to a sealed container or freezer bag to prevent moisture buildup.
Reheating
White Chocolate Ghosts are best enjoyed cold or at room temperature. If you want to soften them slightly, allow them to sit out briefly—avoid microwaving as it can ruin their shape and texture.
FAQs
Can I use white chocolate candy melts instead of chips?
Yes! White chocolate candy melts are an excellent alternative since they melt smoothly and hold their shape well, making them perfect for crafting White Chocolate Ghosts.
How do I prevent white chocolate from seizing?
Ensure you melt the chocolate slowly at a low temperature, stirring constantly and avoiding any contact with water, which causes seizing.
Can I make White Chocolate Ghosts without mini chocolate chips?
Definitely! You can use edible markers, tiny candies, or even piped melted dark chocolate to create the ghost faces.
Are White Chocolate Ghosts suitable for kids to make?
Absolutely. This recipe is a fun and easy activity for kids under supervision, especially when it comes to handling melted chocolate and placing the facial features.
How long do White Chocolate Ghosts last?
Stored properly in an airtight container away from heat and moisture, they typically last up to two weeks while maintaining their freshness and texture.
Final Thoughts
Making White Chocolate Ghosts is an absolute joy and a fantastic way to add a sweet, whimsical touch to your seasonal celebrations. With simple ingredients and easy steps, this recipe welcomes creativity and is sure to impress guests with both taste and festive charm. Grab your chocolate, gather your favorite decorations, and start crafting these delightful treats—you’ll wonder how you ever celebrated Halloween without them!
Related Posts
- Easy Apple Coffee Cake with Cinnamon Streusel Recipe
- Easy Apple Crisp with Oats and Cinnamon Recipe
- Irresistible Sour Cream Apple Pie with Brown Sugar Streusel
White Chocolate Ghosts
White Chocolate Ghosts are an easy and festive treat perfect for Halloween parties and fall gatherings. Made with simple pantry staples, these creamy, sweet, and adorable ghosts are quick to prepare, kid-friendly, and fully customizable with decorations and flavors. They bring a charming, spooky touch to your seasonal celebrations that everyone will enjoy.
- Prep Time: 10 minutes
- Cook Time: 5 minutes
- Total Time: 35 minutes
- Yield: About 20-25 ghosts 1x
- Category: Appetizers
- Method: No-Bake
- Cuisine: American
- Diet: Gluten Free
Ingredients
Base Ingredients
- 8 oz white chocolate chips or bars (about 1 cup)
- Mini chocolate chips (for eyes and mouth)
Tools & Supplies
- Parchment paper or silicone baking mat (for shaping and cooling)
- Wax paper or plastic bags (for piping chocolate details or smoothing shapes)
Optional Flavorings
- 1 teaspoon vanilla extract or almond extract (optional)
Variations (Optional)
- Vegan white chocolate or coconut-based chocolate for dairy-free option
- Food coloring drops to tint chocolate (e.g., pastel green or purple)
- Peppermint or orange extract for flavor variations
- Edible eyes or colored icing pens for decoration
- Dark chocolate to create a two-tone ghost effect
Instructions
- Melt the White Chocolate: Gently melt white chocolate chips or bars in a microwave-safe bowl or double boiler, heating in 15-20 second bursts and stirring well after each to achieve a smooth, glossy texture without burning.
- Prepare Your Work Surface: Lay out parchment paper or a silicone baking mat on a flat surface to create a non-stick canvas for shaping the ghost figures.
- Create Ghost Shapes: Using a spoon or piping bag, carefully form small puffed oval ghost shapes with slight drips at the bottom onto the prepared surface. Imperfect shapes add character and charm.
- Add Facial Features: Place mini chocolate chips on each ghost to form eyes and a small mouth, pressing lightly so they stick to the melted chocolate while maintaining their shape.
- Chill to Set: Refrigerate the tray of ghosts for 20-30 minutes until the chocolate is fully hardened, ensuring they hold their shape and are easy to handle.
- Serve or Store: Once set, transfer the white chocolate ghosts carefully to a serving plate or airtight container. Enjoy immediately or store for later use.
Notes
- Use high-quality white chocolate for smoother melting and creamier taste.
- Melt chocolate slowly and stir frequently to avoid seizing and burning.
- Use room temperature utensils and bowls to facilitate melting and shaping.
- Space ghost shapes evenly on parchment to prevent sticking.
- Personalize facial expressions with mini chocolate chips or edible markers.
- Store in an airtight container in a cool, dry place; refrigerate only if necessary.
- Freeze ghosts in a single layer on parchment before transferring to an airtight container for up to one month.
- Avoid microwaving to soften; let ghosts sit at room temperature briefly if needed.
Nutrition
- Serving Size: 1 ghost (approx. 15g)
- Calories: 90
- Sugar: 10g
- Sodium: 5mg
- Fat: 6g
- Saturated Fat: 4g
- Unsaturated Fat: 1.5g
- Trans Fat: 0g
- Carbohydrates: 10g
- Fiber: 0g
- Protein: 1g
- Cholesterol: 5mg
Keywords: white chocolate ghosts, Halloween treats, spooky candy, easy chocolate recipe, festive snacks, kid-friendly candy